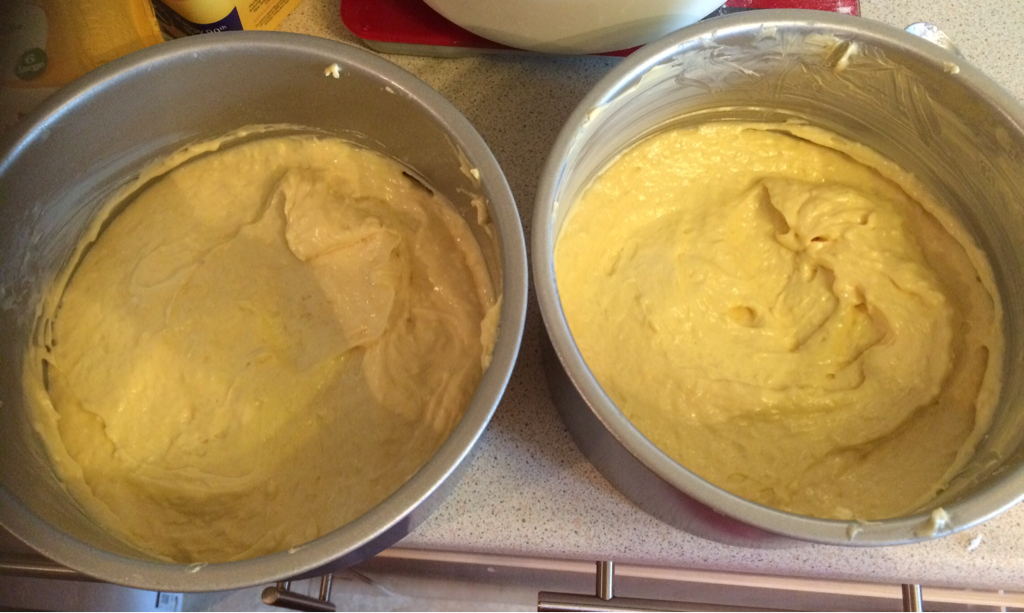
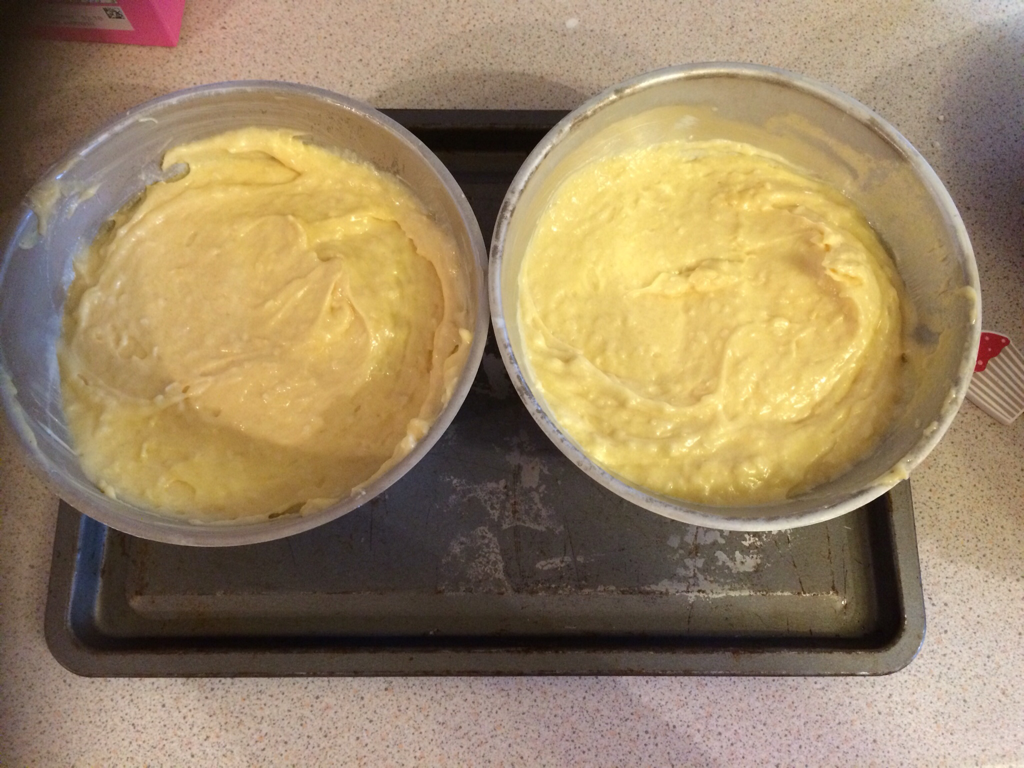
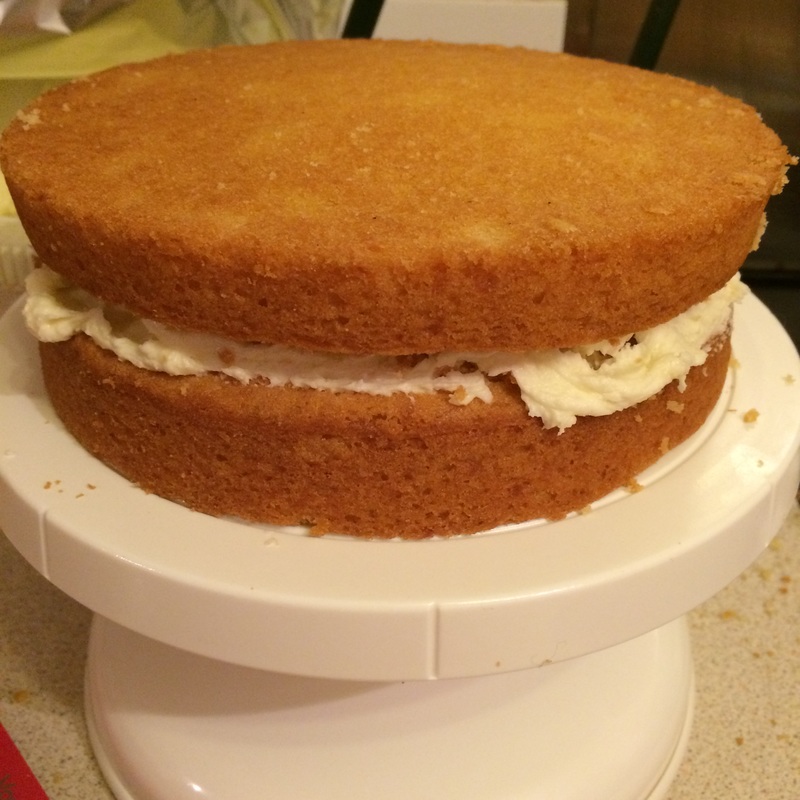
 So, when my friend Ellie asked me if I wanted to go to her Hawaiian/tropical themed birthday party I was excited, and not only because it was a party but because my mind immediately went to cake. I found myself browsing Hawaiian cakes on Pinterest (my favourite site for inspiration). My favorute ones are shown below. I asked Ellie if she wanted me to make her (and her twin sister) a cake (for free) as my present to her and so that I can make something like the beautiful cakes I had been looking at. I asked her if she had any preference to flavour and she asked for coconut which I loved the sound of! A week or so later I saw Frances Bakes post a beautifully decorated raspberry and coconut cake and asked her for the recipe which she kindly gave me. She also suggested using a malibu syrup to soak into the cake for extra flavour and a kick, which I really wanted to try but I could not afford to buy the alcohol so I left it out. Keep on reading for my step by step pictures. This is the recipe Frances gave me for the coconut cake and Buttercream (not her own recipe). It smelt really really coconutty and very moist! Ingredients 175g butter 175g golden caster sugar 175g self rasing flour 3 eggs 50g desiccated coconut 2tbs coconut cream For the filling and topping: 280g icing sugar 100g butter, softened 3tbsp coconut cream, softened 5tbsp jam (I used raspberry) As I wanted to make a 2 tiered cake I doubled the cake and buttercream ingredients. I made it in 2 batches. The first as per the recipe divided into 2x20cm tins and the second into two halves of a ball tin. Method 1. Heat the oven to 180c and grease and line the tins. 2. Mix the butter, sugar, flour, baking powder and eggs into a mixer for 2-3 mins until smooth. 3. Gently stir in the desiccated coconut and coconut cream. 4. Divide the mixture between the 2 tins and smooth the tops.
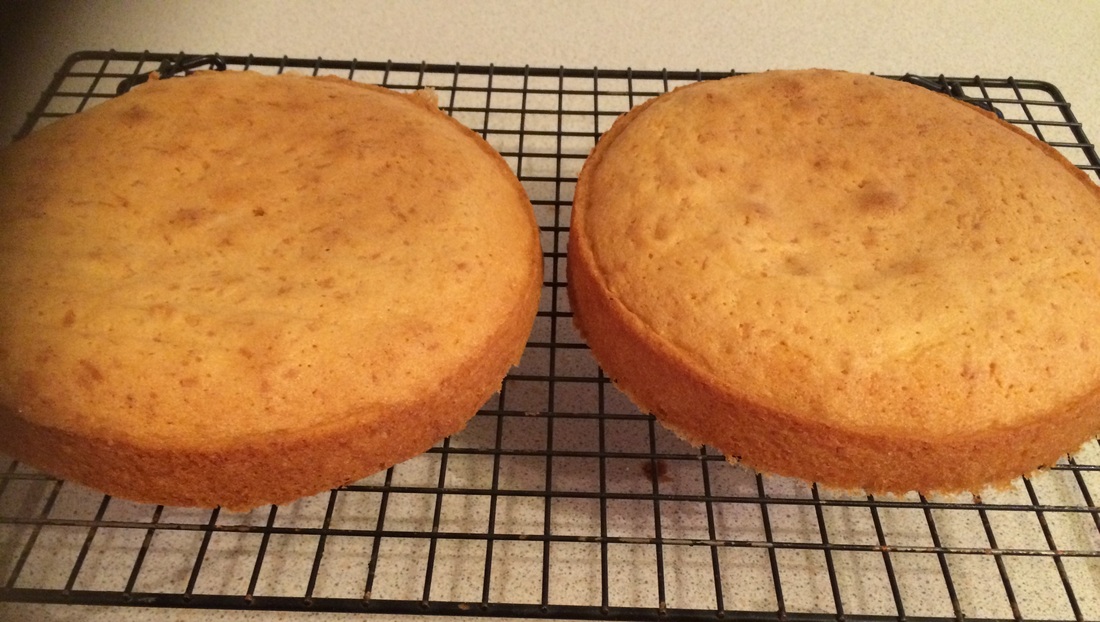
5. Bake in the oven for 25 mins for the larger cake and about15 mins for the smaller round tins. 6. Loosen the edges and leave to cool in the tins for 5 mins then turn out onto a baking rack to cool completely.
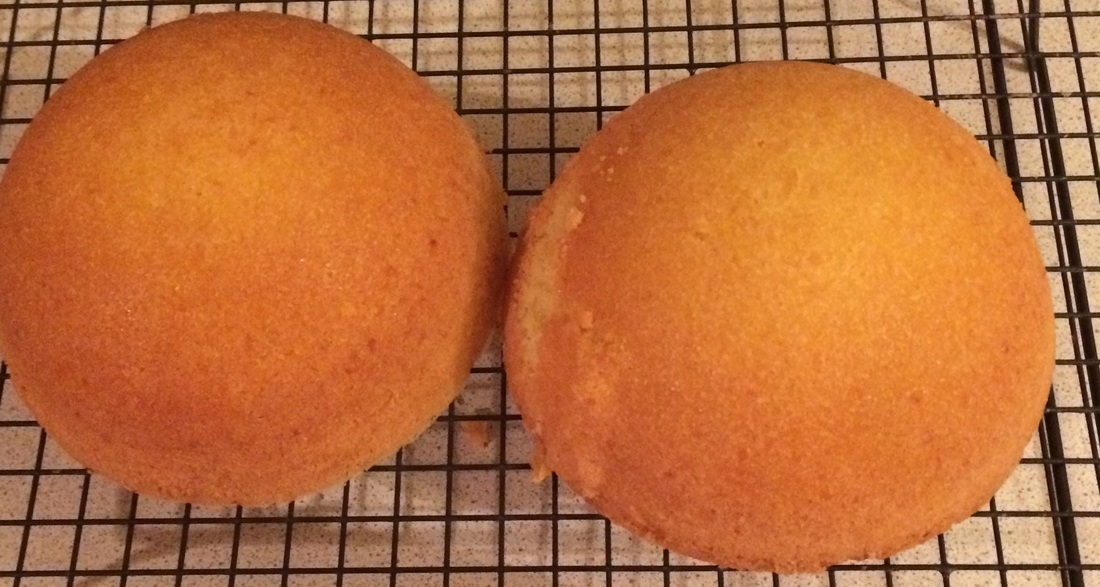
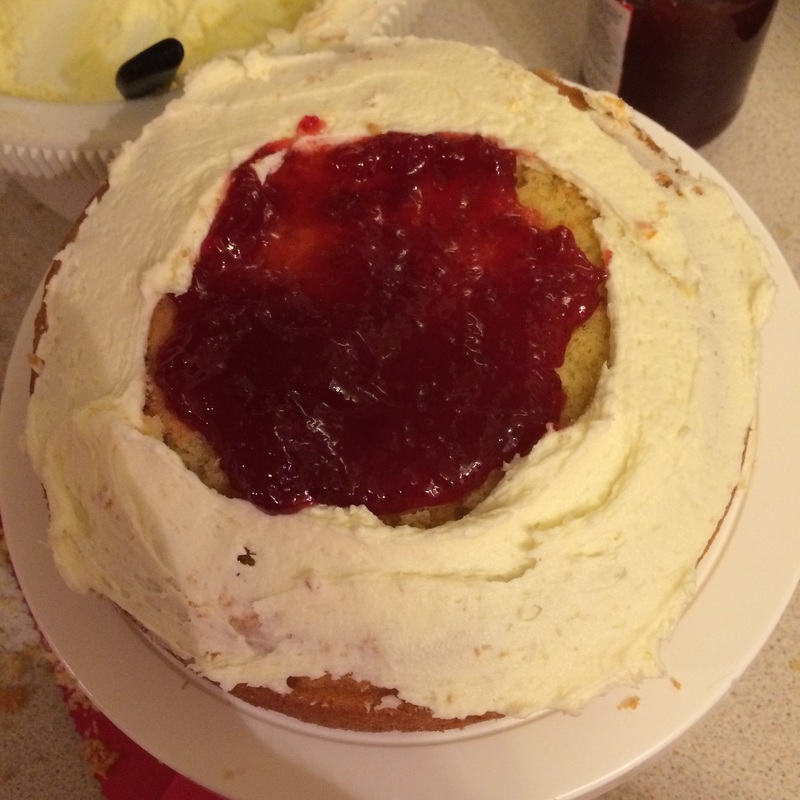
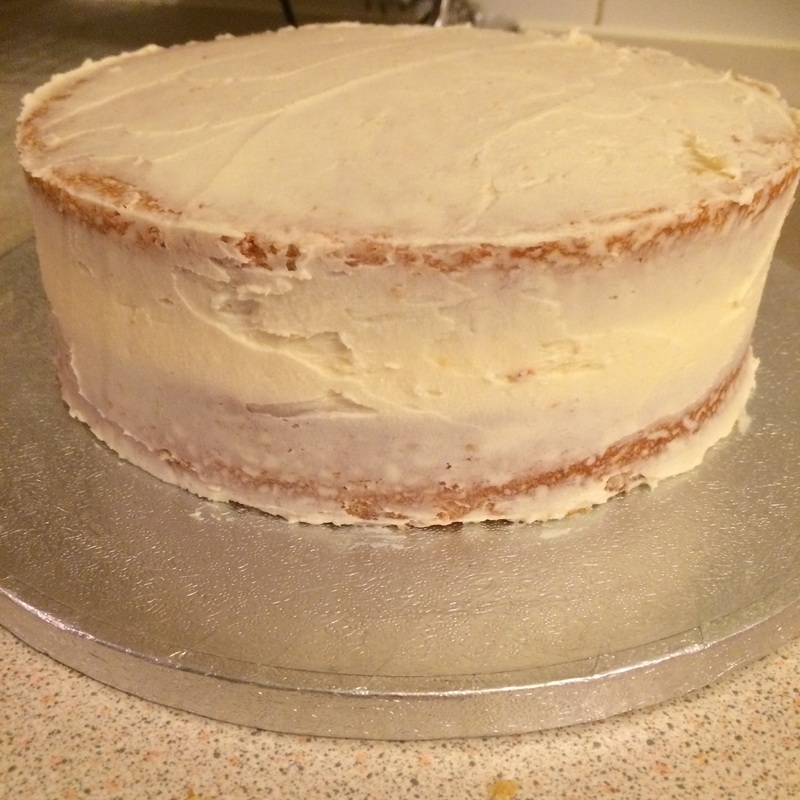
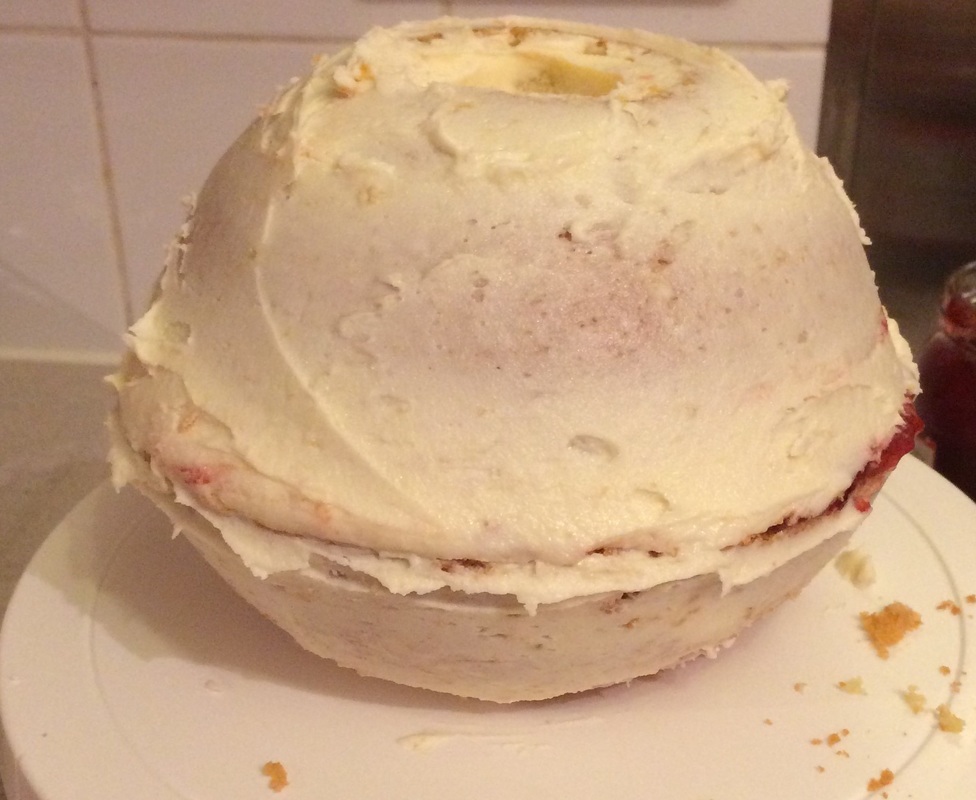
7. Make the buttercream: Beat together the icing sugar, butter and coconut cream until smooth. 8. Pipe a border of buttercream in a ring around the inside edge of one cake and fill the middle with jam, spread more cream onto the whole of the top cake and sandwich them together for the large cake. Cover the whole of the cake in a layer of buttercream and put in the fridge to set. 9. With the round sphere cake you need to get one round cake and place the round edge onto the surface and cut the round edge off to make a flat surface for the cake to sit on, I also cut a whole out of the top so that the coconut looked like it was a cocktail. Repeat the jam and buttercream steps.
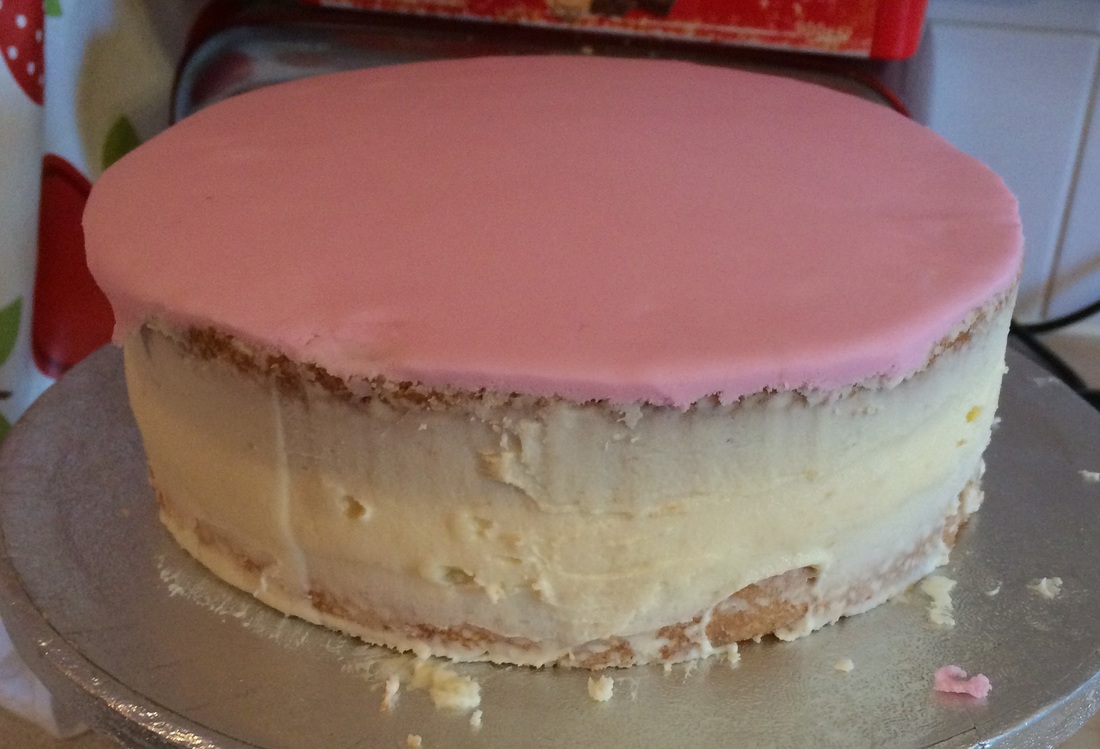
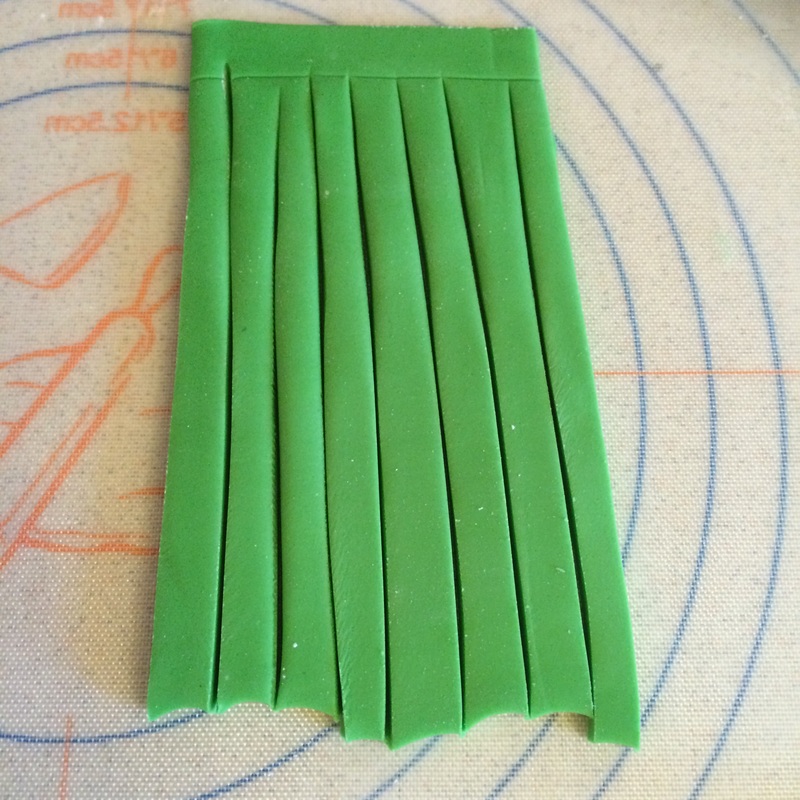
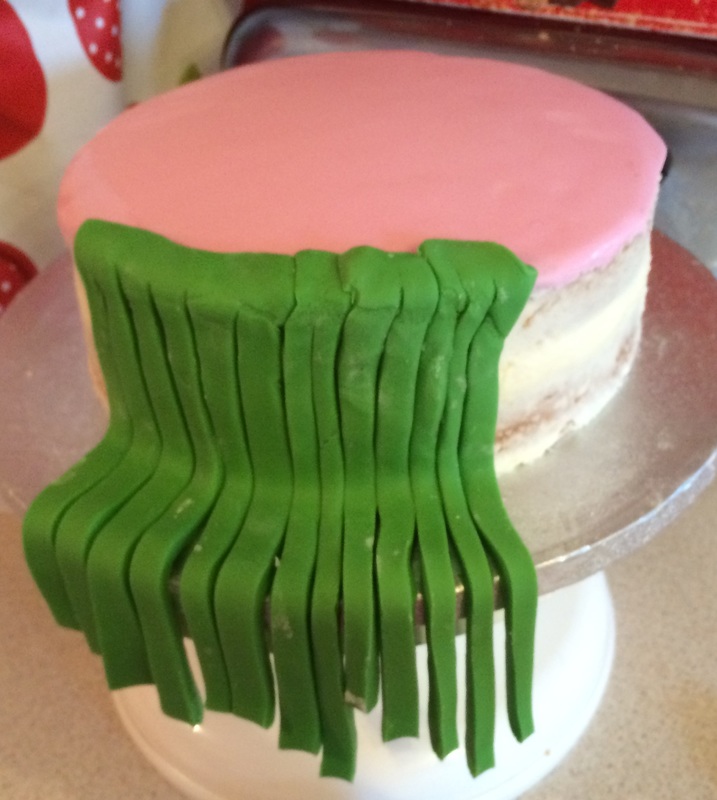
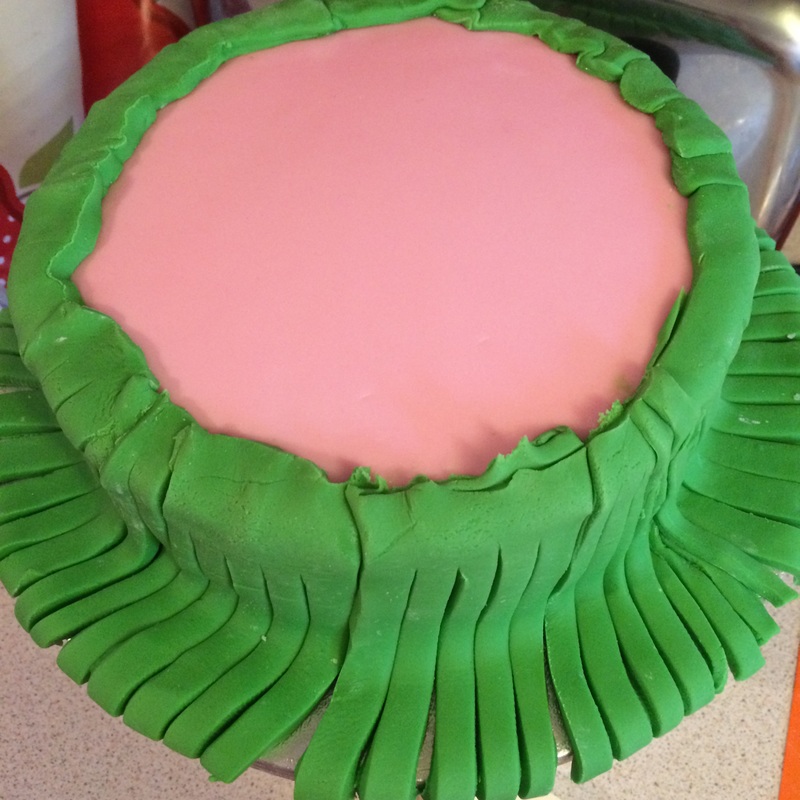
This is where the decoration comes in, the exciting part where you can be colourful and creative! 1. I covered the top of the large bottom tier cake in a disc of pink fondant. 2. I then rolled out a rage strip of green fondant and cut even strips leaving a gap at the top for the grass skirt, I cut strips of about 4 or 5 of the skirt and placed them onto the side of the cake sticking it to the top with some edible glue. I did this all around the cake.
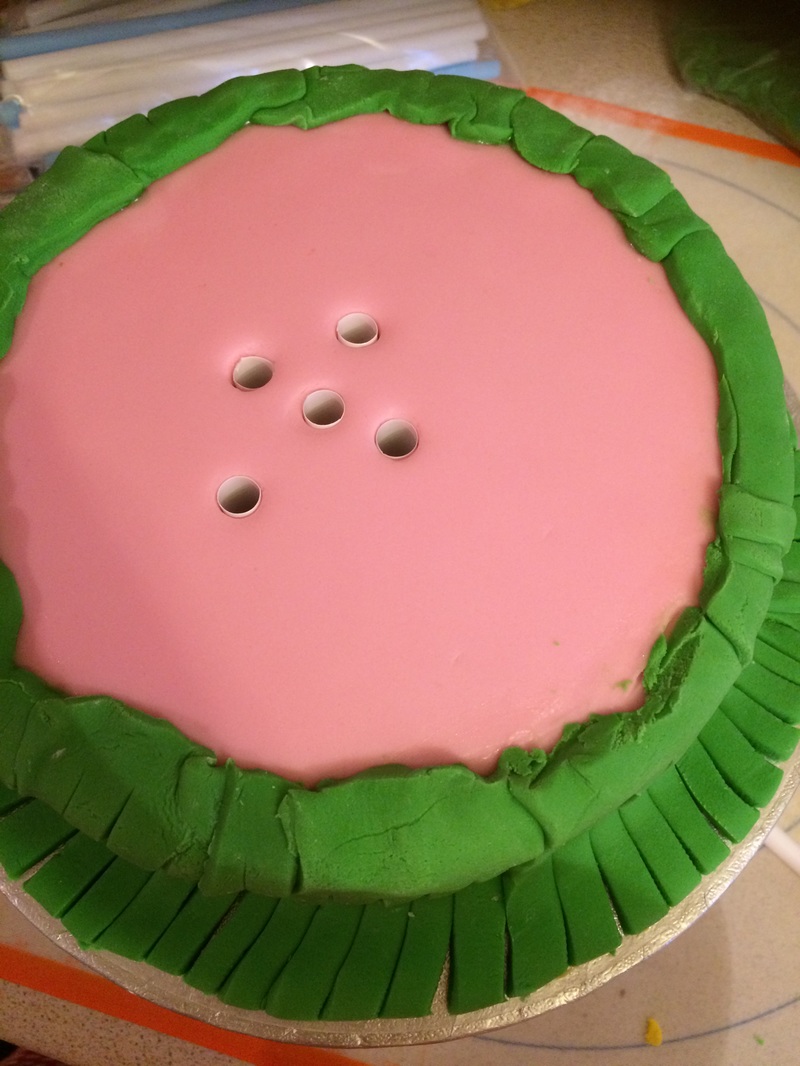
Now put 5 dowels into the middle of the cake and around evenly, making sure they are the exact same height as the cake. Put a splodge of buttercream over the dowel holes, to stick the top tier to the bottom.
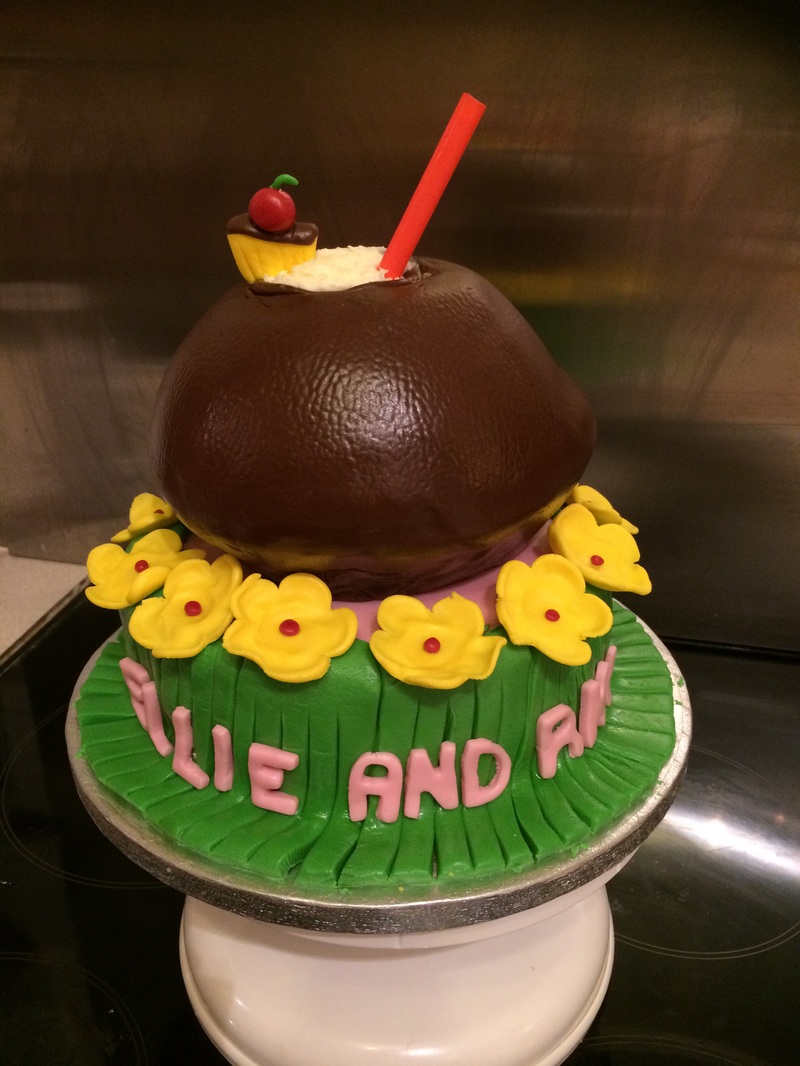
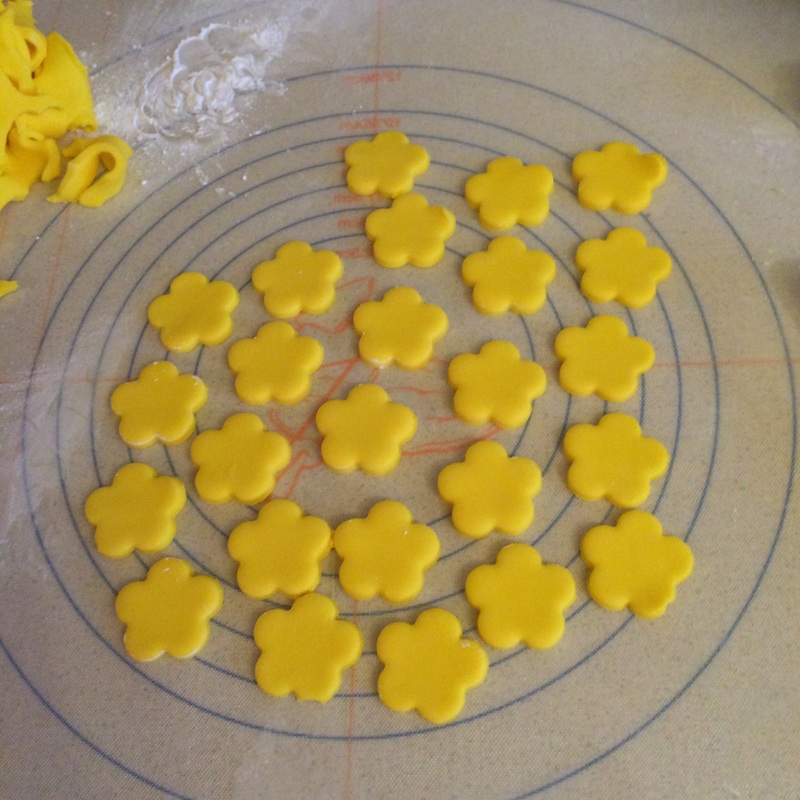
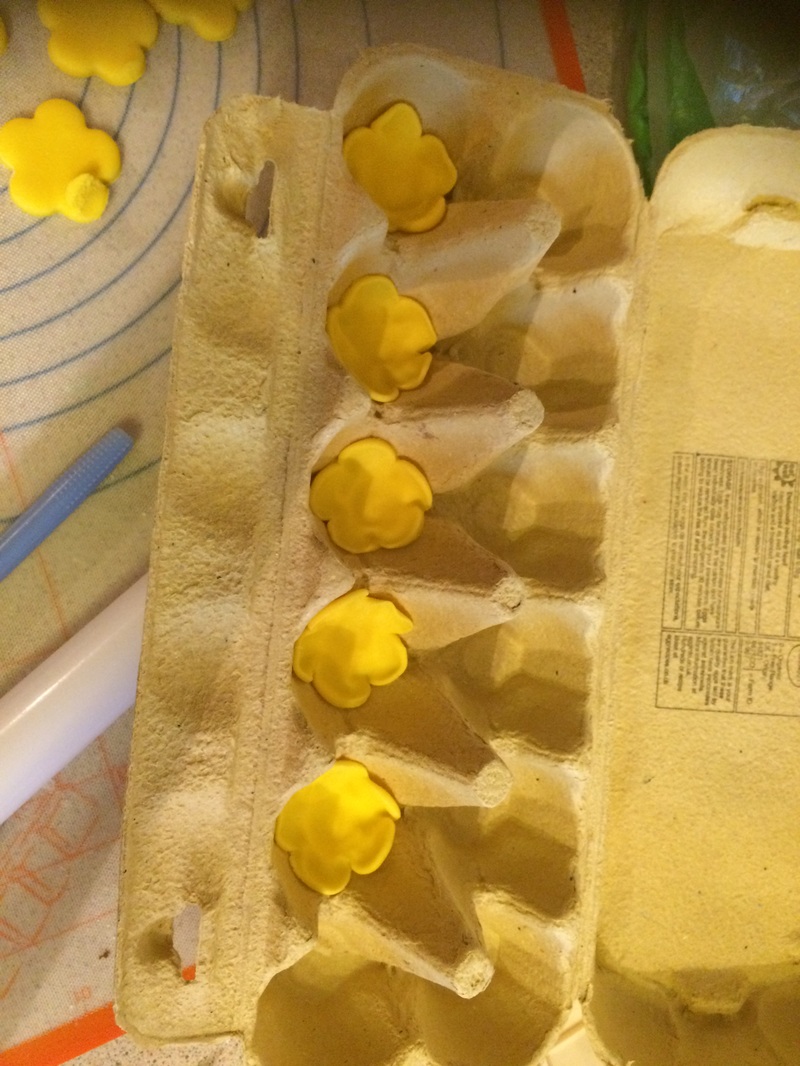
Now cover the round/sphere cake in brown fondant and smooth, cutting off any excess and cutting around the top hole. Fill the hole with more buttercream and rough about so it looks like frothy liquid. I then used a texture mat and gently pressed it onto the fondant to make a texture more like a coconut. Leave this to harden for at least an hour, then place directly in the middle of the bottom tier and press gently. 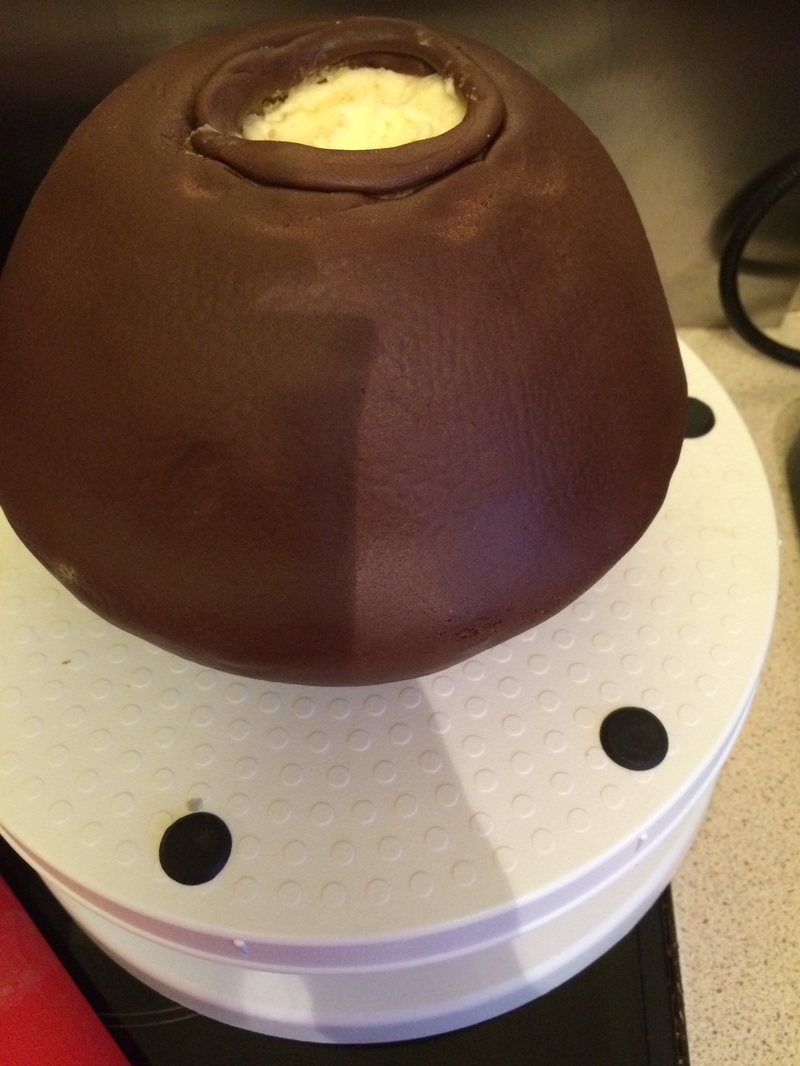 I then cut some flowers out of yellow fondant and smoothed the edges of the petals with a ball tool to make them look more life like. I then put them in an empty egg carton to harden and have more of a curl to them. I then glued them all around the top of the grass skirt, hiding any bad green icing.
I finished the cake by making a little wedge of pineapple with a cherry on top to sit on the side of the coconut, I then stuck a straw into the buttercream cocktail and stamped out some letters to spell the names of the birthday girls. I then used my favourite tool to set and finish a cake, my new cake steamer! It gets rid of any tiny bits of icing sugar and makes it have a glossy shine. I hope you enjoyed reading this! and I hope I have helped if you need to make a similar cake. 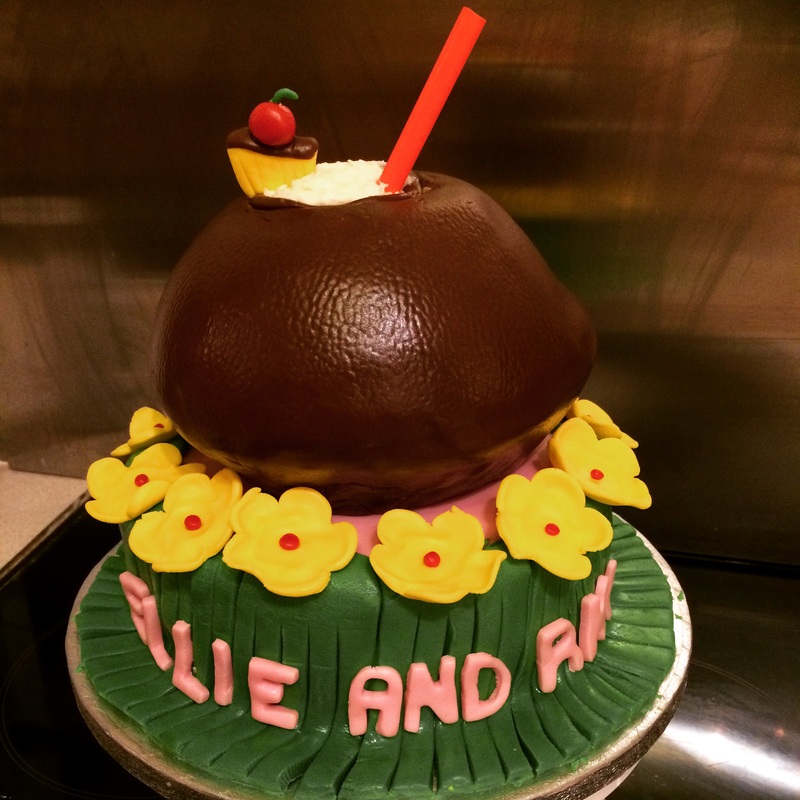
0 Comments
Leave a Reply. |
Archives
March 2017
Categories
All
|


 RSS Feed
